


This blog post is the first one of a multi-part series of posts exploring various peripherals of the ESP32C3 microcontroller using the embedded Rust embassy framework.
Introduction
Around a similar timeframe last year, I launched a series of Embassy posts based on the STM32. As exciting as it was back then, the Embassy framework and ecosystem has continued to thrive since. For those also following my posts, I have been recently mostly publishing posts about the ESP32 with Rust. Thus far, I've done several series including no_std development, std development, and the IoT framework. However, I haven't tackled embassy on ESP yet, which this post will kick-off.
The embassy framework is exciting because it provides async capability for embedded bare metal no-std implementations. It is sort of the equivalent of Tokio in the context of std . Embedded applications often avoid the deployment of an operating system due to the limited resources in microcontrollers. Nevertheless, embedded implementations still require some sort of executor to organize tasks. Embassy offers that, with a more modern approach through Futures and async/await.
Embassy implementations on the STM32 the embassy framework entailed two main parts: 1) the executor and 2) the STM32 HAL. The STM32 embassy HALs encompassed almost all STM32 device families compared to non-embassy HALs. Non-embassy HALs were restricted to mostly a single family of devices.
Embassy on the ESP32 takes a slightly different approach to the STM32. ESPs leverage the embassy executor with existing device HALs, and support community-driven HALs that establish common behavior. By community-driven HALs I mean crates like embedded-hal and embedded-io. These community-driven HALs are crates that establish a layer with common behavior among devices. If leveraged properly, these HALs can enable portability among a wider range of devices where software can be platform agnostic. Last year, embedded-hal and embedded-io didn't support async. Ever since, however, both embedded-hal-async and embedded-io-async have emerged.
In this post, I'll be starting out with a simple application. In this application, I'll be showing how to set up and use the embassy executor to spawn a task. Let's dig in.
📚 Knowledge Pre-requisites
To understand the content of this post, you need the following:
Basic knowledge of coding in Rust.
Knowledge of
async/awaitandFutures.Familiarity with the basic template for creating embedded applications in Rust.
Knowledge of the embassy-executor.
💾 Software Setup
All the code presented in this post is available on the apollolabs ESP32C3 git repo. Note that if the code on the git repo is slightly different then it means that it was modified to enhance the code quality or accommodate any HAL/Rust updates.
Additionally, the full project (code and simulation) is available on Wokwi here.
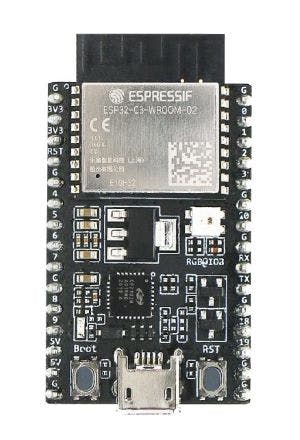
🛠 Hardware Setup
Materials
-
👨🎨 Software Design
In the application in this post, we'll show how to set up the embassy executor for the ESP32. The application will spawn an async task that increments a count and will execute once every second. Additionally, the main task will maintain its own count and execute every 5 seconds.
👨💻 Code Implementation
📥 Crate Imports
In this implementation, the following crates are required:
The
embassy_executorcrate to import the embassy executor implementation.The
esp_backtracecrate to define the panicking behavior.The
esp32c3_halcrate to import the ESP32C3 device hardware abstractions.The
esp_printlncrate to be able to log to console output.The
embassy-timecrate for embassy time abstractions.
use embassy_executor::Spawner;
use embassy_time::{Duration, Timer};
use esp32c3_hal::{clock::ClockControl, embassy, peripherals::Peripherals, prelude::*};
use esp_backtrace as _;
use esp_println::print;
⏳ The One-Second Task
Ahead of defining the main task, we'd want to define the behaviour of the one-second task as it would be kicked off/spawned by the main task.
1️⃣ Create a Task : Tasks in embassy are marked by the #[embassy_executor::task] macro followed by a async function implementation. The task created is referred to as one_second_task, it takes no arguments and is defined as follows:
#[embassy_executor::task]
async fn one_second_task()
2️⃣ Define the Task Behaviour: In the task, we want to maintain a count that will increment every second. As such, we need to introduce a count variable:
let mut count = 0;
After that, we'll need to enter a loop that will continuously execute the same code. Inside the loop , we first need to print the count value using println, then increment count:
esp_println::println!("Spawn Task Count: {}", count);
count += 1;
Then we establish a 1-second timer delay using the following code:
Timer::after(Duration::from_millis(1_000)).await;
Timer comes from the embassy_time crate. after is a Timer instance method that accepts a Duration and returns a Future. As such, await allows us to yield execution to the executor such that the task can be polled later to check if the delay expired.
Once the delay expires, the code will proceed to loop again and execute the same code all over again.
Here's the task full loop code:
loop {
    esp_println::println!("Spawn Task Count: {}", count);
    count += 1;
    Timer::after(Duration::from_millis(1_000)).await;
}
📱 The Main Task
The start of the main task is marked by the following code:
#[main]
async fn main(spawner: Spawner)
As the documentation states: "The main entry point of an Embassy application is defined using the #[main] macro. The entry point is also required to take a Spawner argument." As we'll see, Spawner is what will allow us to spawn or kick-off one_second_task.
The following steps will mark the tasks performed in the main task.
1️⃣ Obtain a handle for the device peripherals & system clocks: In embedded Rust, as part of the singleton design pattern, we first have to take the PAC-level device peripherals. This is done using the take() method. Here I create a device peripheral handler named peripherals , a system peripheral handler system, and a system clock handler clocks as follows:
    let peripherals = Peripherals::take();
    let system = peripherals.SYSTEM.split();
    let clocks = ClockControl::boot_defaults(system.clock_control).freeze();
2️⃣ Initialize Embassy for the ESP32C3:
In embassy, there exists an init function that takes two parameters. The first is system clocks and the second is an instance of a timer. Under the hood, what this function does is initialize the embassy timer driver. As such, we can initialize embassy as follows:
embassy::init(
    &clocks,
    esp32c3_hal::timer::TimerGroup::new(peripherals.TIMG0, &clocks).timer0,
);
📝 Note: At the time of writing this post, I couldn't really locate the
initfunction docs.rs documentation*. It didnt seem easily accessible through any of the current HAL implementation documentation. Nevertheless, I reached the signature of the function through the source* here.
3️⃣ Spawn the One Second Task:
Tasks can be spawned in embassy simply by calling the spawn method on spawner and passing the task name as an argument. As such one_second_task can be kicked off using the spawn method as follows:
spawner.spawn(one_second_task()).unwrap();
Note that spawn() returns a Result thus the corresponding unwrap.
Next, we can move on to the application Loop.
🔁 Main Task Loop
The main task loop will look exactly the same as the one-second task with two minor differences. The first difference is the amount of delay which will be 5 seconds in this case. The second difference is the message printed so that we can distinguish the task that printed it. Here is the code:
let mut count = 0;
    loop {
        esp_println::println!("Main Task Count: {}", count);
        count += 1;
        Timer::after(Duration::from_millis(5_000)).await;
    }
This concludes the code for the full application. Note the differences in the template from a no_std application mainly have to do with the executor additions. Other than that, most things are more or less the same. Going forward, where this will make a huge difference is implementing interrupt-based code. You'll notice that it doesn't take as much code.
📱 Full Application Code
Here is the full code for the implementation described in this post. You can additionally find the full project and others available on the apollolabs ESP32C3 git repo. Also, the Wokwi project can be accessed here.
#![no_std]
#![no_main]
#![feature(type_alias_impl_trait)]

use embassy_executor::Spawner;
use embassy_time::{Duration, Timer};
use esp32c3_hal::{clock::ClockControl, embassy, peripherals::Peripherals, prelude::*};
use esp_backtrace as _;
use esp_println::print;

#[embassy_executor::task]
async fn one_second_task() {
  let mut count = 0;
    loop {
        esp_println::println!("Spawn Task Count: {}", count);
        count += 1;
        Timer::after(Duration::from_millis(1_000)).await;
    }
}

#[main]
async fn main(spawner: Spawner) {
    let peripherals = Peripherals::take();
    let system = peripherals.SYSTEM.split();
    let clocks = ClockControl::boot_defaults(system.clock_control).freeze();

    embassy::init(
        &clocks,
        esp32c3_hal::timer::TimerGroup::new(peripherals.TIMG0, &clocks).timer0,
    );

    spawner.spawn(one_second_task()).unwrap();

// This line is for Wokwi only so that the console output is formatted correctly
print!("\x1b[20h");

let mut count = 0;
    loop {
        esp_println::println!("Main Task Count: {}", count);
        count += 1;
        Timer::after(Duration::from_millis(5_000)).await;
    }
}
Conclusion
In this post, a simple embassy-based application was created for the ESP32C3. The post shows how to set up a basic template for running embassy on bare-metal ESP32. It will be seen in later posts that leveraging embassy provides for a smoother sail compared to existing approaches. This especially holds true for interrupt-based implementations. Have any questions/comments? Share your thoughts in the comments below 👇.