


Introduction
This post is the first in a new IoT series for using Rust on the ESP32. This new series will focus on several IoT hardware and cloud connectivity aspects such as WiFi and HTTP. In a past post explaining the Rust ecosystem, such features are referred to as services in the ESP-IDF framework. Consequently, support for almost all ESP-IDF services is provided through the esp-idf-svc crate. These services include Wifi, Ethernet, HTTP client & server, MQTT, WS, NVS, OTA, etc.
For most of the IoT services, acquiring some sort of access to the network always comes first. As such, in this post, we'll start the series by configuring and setting up WiFi in which we'll be leveraging the esp-idf-svc crate for that. This post is meant to be kept simple since adding more services can drive the code toward verbosity quickly. This same code, however, will be utilized again in all following posts in this series to achieve network connection.
📚 Knowledge Pre-requisites
To understand the content of this post, you need the following:
Basic knowledge of coding in Rust.
Basic familiarity with WiFi.
💾 Software Setup
All the code presented in this post is available on the apollolabs ESP32C3 git repo. Note that if the code on the git repo is slightly different then it means that it was modified to enhance the code quality or accommodate any HAL/Rust updates.
Additionally, the full project (code and simulation) is available on Wokwi here.
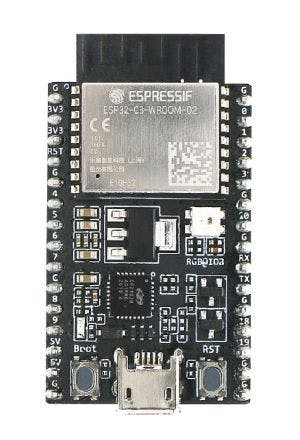
🛠 Hardware Setup
Materials
👨🎨 Software Design
We can configure WiFi to be in either station mode or access point mode. Access point mode is when we want to set up the ESP as a hotspot to allow other clients to connect to it. Sort of like a router that you have at home. On the other hand, station mode is the one we'll be using and more familiar with. Station mode is when you are accessing a wireless hotspot as a client. To do that we need to go through the following steps:
Configure WiFi
Start WiFi
Connect WiFi
(Optional) Confirm Connection and Check Connection Configuration
🤷♂️ The anyhow Crate
Before proceeding further, I'd like to mention the AnyHow crate. In most prior posts, you might notice that many methods, especially configuring peripherals, return a Result. In most cases before, I would use the unwrap method to obtain the wrapped values. Result as commonly known in Rust has two options; Ok() and Err() . unwrap in turn, extracts the value contained in the Ok variant of a Result . However, if the Result is the Err variant, then unwrap will panic with a generic message.
You can imagine that this behavior can make errors hard to debug. As a result, if the hardware can provide more context it would be helpful. The ESP-IDF framework already has a list of error codes that allow for the creation of more robust applications. The different error codes give more context into the type of run-time errors and whether they are recoverable or not. Espressif integrates these error codes through the anyhow crate. As such, if your code panics, you'll receive more informative messages. Many of the errors support the services and are particularly useful in wireless implementations.
In order to integrate this feature, you need to first declare the anyhow crate dependency in your cargo.toml and then import it. Afterward, for the main function return type, we replace the bang ! (indicating the function never returns) with anyhow::Result . Finally, we can replace all unwrap instances for expressions that return a Result with the ? operator. Replacing the expression with ? will result in the Ok unwrapped value if everything is fine. On the other hand, if the result is Err, the Err value is propagated to the enclosing function (main in our case).
Note 📝
The
anyhowcrate provides support forno_stdimplementations almost all the same API are available and works in a similar manner tostdimplementations. Please refer to the documentation for more detail.
👨💻 Code Implementation
📥 Crate Imports
In this implementation, the following crates are required:
The
anyhowcrate for error handling.The
esp_idf_halcrate to import the peripherals.The
esp_idf_svccrate to import the device services (wifi in particular).The
embedded_svccrate to import the needed service traits.
use anyhow::{self, Error};
use embedded_svc::wifi::{AuthMethod, ClientConfiguration, Configuration};
use esp_idf_hal::peripherals::Peripherals;
use esp_idf_svc::eventloop::EspSystemEventLoop;
use esp_idf_svc::nvs::EspDefaultNvsPartition;
use esp_idf_svc::wifi::EspWifi;
🎛 Initialization/Configuration Code
1️⃣ Obtain a handle for the device peripherals: Similar to all past blog posts, in embedded Rust, as part of the singleton design pattern, we first have to take the device peripherals. This is done using the take() method. Here I create a device peripheral handler named peripherals as follows:
let peripherals = Peripherals::take().unwrap();
2️⃣ Obtain handle for WiFi driver: the esp-idf-svc documentation contains more than one struct option to create a WiFi instance. EspWifi and WifiDriver , EspWifi provides a higher OSI model level with features that would ease networking examples later. EspWifi also encapsulates a WifiDriver within its implementation. Within the EspWifi struct, there exists a new method to create an instance with the following signature:
pub fn new<M: WifiModemPeripheral>(
    modem: impl Peripheral<P = M> + 'd,
    sysloop: EspSystemEventLoop,
    nvs: Option<EspDefaultNvsPartition>
) -> Result<Self, EspError>
Note it requires three parameters, a modem peripheral, a EspSystemEventLoop, and a EspDefaultNvsPartition wrapped in an Option. Both EspSystemEventLoop and EspDefaultNvsPartition are singletons types that have a take method. As such, we can create handles for each and then pass them as arguments to the EspWifi new method. Here's the code:
let sysloop = EspSystemEventLoop::take()?;
let nvs = EspDefaultNvsPartition::take()?;
let mut wifi = EspWifi::new(peripherals.modem, sysloop, Some(nvs))?;
3️⃣ Configure the WiFi Driver: note that wifi is still not configured. Also within EspWifi there exists a set_configuration method that takes a single &Configuration argument. Configuration is an enum of structs that looks as follows:
pub enum Configuration {
    None,
    Client(ClientConfiguration),
    AccessPoint(AccessPointConfiguration),
    Mixed(ClientConfiguration, AccessPointConfiguration),
}
Note that there are several options for configuration as discussed earlier. We want to configure the ESP as a client so we're going to go for the Client option. Following that, the ClientConfiguration struct wrapped inside the Client option has the following definition:
pub struct ClientConfiguration {
    pub ssid: String<32>,
    pub bssid: Option<[u8; 6]>,
    pub auth_method: AuthMethod,
    pub password: String<64>,
    pub channel: Option<u8>,
}
Out of the different members, were only going to configure ssid which is the network id, password which is the network password, and auth_method which is the network authentication method. Finally, the rest will be configured with defaults as follows:
wifi.set_configuration(&Configuration::Client(ClientConfiguration {
    ssid: "SSID".into(),
    password: "PASSWORD".into(),
    auth_method: AuthMethod::None,
    ..Default::default()
}))?;
This is it for configuration! Let's now jump into the application code.
📱 Application Code
1️⃣ Start and Connect Wifi: Now that wifi is configured, all we need to do is start it and then connect to a network. Both methods are part of the EspWifi type:
// Start Wifi
wifi.start()?;
// Connect Wifi
wifi.connect()?;
2️⃣ Confirm Connection: At this point, WiFi should connect to the network and we can confirm the connection. For that, there exists a is_connected method returns a bool wrapped in a Result. We can also get the configuration of the connection using the get_configuration method:
// Wait for connection to happen
while !wifi.is_connected().unwrap() {
    // Get and print connetion configuration
    let config = wifi.get_configuration().unwrap();
    println!("Waiting for station {:?}", config);
}

println!("Connected");
This is it! Connecting to WiFi with Rust might have turned out to be easier than you might have thought!
📱Full Application Code
Here is the full code for the implementation described in this post. You can additionally find the full project and others available on the apollolabs ESP32C3 git repo. Also, the Wokwi project can be accessed here.
use anyhow::{self, Error};
use embedded_svc::wifi::{AuthMethod, ClientConfiguration, Configuration};
use esp_idf_hal::peripherals::Peripherals;
use esp_idf_svc::eventloop::EspSystemEventLoop;
use esp_idf_svc::nvs::EspDefaultNvsPartition;
use esp_idf_svc::wifi::EspWifi;

fn main() -> anyhow::Result<()> {
    esp_idf_sys::link_patches();

    // Configure Wifi
    let peripherals = Peripherals::take().unwrap();
    let sysloop = EspSystemEventLoop::take()?;
    let nvs = EspDefaultNvsPartition::take()?;

    let mut wifi = EspWifi::new(peripherals.modem, sysloop, Some(nvs))?;

    wifi.set_configuration(&Configuration::Client(ClientConfiguration {
        ssid: "Wokwi-GUEST".into(),
        password: "".into(),
        auth_method: AuthMethod::None,
        ..Default::default()
    }))?;

    // Start Wifi
    wifi.start()?;

    // Connect Wifi
    wifi.connect()?;

    // Confirm Wifi Connection
    while !wifi.is_connected().unwrap() {
        // Get and print connection configuration
        let config = wifi.get_configuration().unwrap();
        println!("Waiting for station {:?}", config);
    }

    println!("Connected");

    Ok(())
}
Conclusion
Wi-Fi is the base of many IoT projects and enables a wide variety of applications. ESPs also some of the most popular devices among makers for enabling such projects. This post introduced how to configure and connect ESP Wifi in station mode using Rust and the esp_idf_svc crate. Have any questions? Share your thoughts in the comments below 👇.