


This blog post is the seventh of a multi-part series of posts where I explore various peripherals in the STM32F401RE microcontroller using embedded Rust and embassy. Please be aware that certain concepts in newer posts could depend on concepts in prior posts.
Prior posts include (in order of publishing):
Embedded Rust & Embassy: I2C Temperature Sensing with BMP180
Embedded Rust and Embassy: Timer Ultrasonic Distance Measurement
Introduction
From a past post about the stm32f4xx-hal, to say the least, working with DMA controllers for the first time was a royal pain. This was even when the RTIC framework was used, which in a way made things easier. As a result, I decided to set up DMA in embassy and see how it compares. The results are astonishing. Setting up DMA in embassy turns out to be incredibly simple. The main drawback though is that DMA, at the point of writing this post, is still not supported for all STM32 peripherals just yet (significantly ADCs). Though it's a matter of time.
In this post, I demonstrate DMA usage by creating a UART application that echoes messages received from a host PC. The application will use DMA channels to buffer data for both transmit and receive operations.
📚 Knowledge Pre-requisites
To understand the content of this post, you need the following:
Basic knowledge of coding in Rust.
Knowledge of
async/awaitandFutures.Familiarity with the basic template for creating applications in Rust embassy.
Familiarity with interrupts in Cortex-M processors.
Familiarity with UART communication basics.
💾 Software Setup
All the code presented in this post in addition to instructions for the environment and toolchain setup is available on the apollolabsdev Nucleo-F401RE git repo. Note that if the code on the git repo is slightly different then it means that it was modified to enhance the code quality or accommodate any HAL/Rust updates.
In addition to the above, you would need to install some sort of serial communication terminal on your host PC. Some recommendations include:
For Windows:
For Mac and Linux:
Apart from Serial Studio, some detailed instructions for the different operating systems are available in the Discovery Book.
For me, Serial Studio comes highly recommended. I personally came across Serial Studio recently and found it to be awesome for two main reasons. First is that you can skip many of those instructions for other tools, especially in Mac and Linux systems. Second, if you are you want to graph data over UART, it has a really nice and easy-to-configure setup. It's also open-source and free to use.
🛠 Hardware Setup
Materials
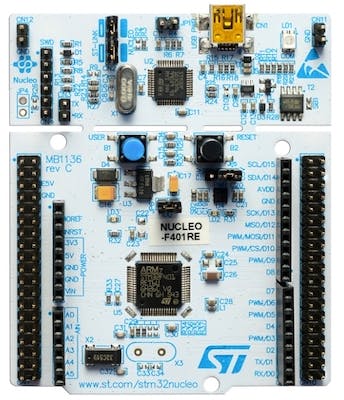
🔌 Connections
There will be no need for external connections. On-board connections will be utilized and include the following:
- The UART Tx and Rx lines connect to the PC through the onboard USB bridge via pins PA2 and PA3 on the microcontroller, respectively. These are hardwired pins, meaning you cannot use any other for this setup. Unless you are using a different board other than the Nucleo-F401RE, you have to check the relevant documentation (reference manual or datasheet) to determine the number of the pin.
👨🎨 Software Design
For the purposes of this post, there isn't anything too special being performed. Using async, the application will keep listening for a UART message to be received. Once a message is received, it will be echoed back (transmitted) to the host.
👨💻 Code Implementation
📝 Note:
The application here will be using
asyncand thus the embassy executor. This means that the embassy template using the#[embassy_executor::main]macro and theasyncmainfunction needs to be used.
📥 Crate Imports
In this implementation the crates required are as follows:
The
embassy_executorcrate to import the embassy embedded async/await executor.The
embassy_stm32crate to import the embassy STM32 series microcontroller device hardware abstractions. The needed abstractions are imported accordingly.The
panic_haltcrate to define the panicking behavior to halt on panic.
use embassy_executor::Spawner;
use embassy_stm32::interrupt;
use embassy_stm32::usart::{Config, Uart};
use panic_halt as _;
📱 The Main Task
🎛 Peripheral Configuration & Task Spawning
The start of the main task is marked by the following code:
#[embassy_executor::main]
async fn main(spawner: Spawner)
The main task in this application will be the only one we have and the only one we need. The following steps will mark the tasks performed in the main task:
1️⃣ Initialize MCU and obtain a handle for the device peripherals: A device peripheral handler p is created:
let p = embassy_stm32::init(Default::default());
Here we're just passing the default value for the Config type.
2️⃣ Configure UART and obtain handle: Looking into the Nucleo-F401RE board pinout, the Rx and Tx line pins PA3 and PA2, respectively, connect to the USART2 peripheral in the microcontroller device. As such, this means we need to configure USART2 and somehow pass it to the handle of the pins we want to use. Under embassy_stm32::usart::Uart there exists a new method to configure UART with the following signature:
pub fn new(
    peri: impl Peripheral<P = T> + 'd,
    rx: impl Peripheral<P = impl RxPin<T>> + 'd,
    tx: impl Peripheral<P = impl TxPin<T>> + 'd,
    irq: impl Peripheral<P = T::Interrupt> + 'd,
    tx_dma: impl Peripheral<P = TxDma> + 'd,
    rx_dma: impl Peripheral<P = RxDma> + 'd,
    config: Config,
) -> Self {
Where peri expects an argument passing in a UART peripheral instance, rx and tx Pin instances for the UART Rx and Tx pins, irq a handle for the UART interrupt source, rx_dma tx_dma instances for DMA channels, and config a Config configuration struct to configure UART. As such, a handle irq for the interrupt source is created as follows:
let irq = interrupt::take!(USART2);
And then the UART peripheral instance usart created in the following line of code:
    let mut usart = Uart::new(
        p.USART2,
        p.PA3,
        p.PA2,
        irq,
        p.DMA1_CH6,
        p.DMA1_CH5,
        Config::default(),
    );
Here USART2 is passed since it corresponds in the STM32F401 to pins PA2 and PA3 which are also passed as second and third parameters. The choice of the DMA channels DMA1_CH5 and DMA1_CH6, are not random and are obtained from the datasheet of the STM32F401.
That's it, UART is configured with two DMA channels for receiving and transmitting!
🔁 The Application
The application code is only 4 lines long:
let mut msg: [u8; 8] = [0; 8];

usart.write(b"Starting Echo\r\n").await.unwrap();

loop {
   usart.read(&mut msg).await.unwrap();
   usart.write(&msg).await.unwrap();
 }
After printing the "Starting Echo" message, the application enters the continuous loop. In the loop, the usart.read(&mut msg).await.unwrap(); line will await until it reads enough characters to fill msg. After that, the usart.write(&msg).await.unwrap(); line echoes back all the characters in msg.
That's it! This concludes the code for the full application.
📱 Full Application Code
Here is the full code for the implementation described in this post. You can additionally find the full project and others available on the apollolabsdev git repo.
#![no_std]
#![no_main]
#![feature(type_alias_impl_trait)]

use embassy_executor::Spawner;
use embassy_stm32::interrupt;
use embassy_stm32::usart::{Config, Uart};
use panic_halt as _;

#[embassy_executor::main]
async fn main(_spawner: Spawner) {
    let p = embassy_stm32::init(Default::default());

    let irq = interrupt::take!(USART2);
    let mut usart = Uart::new(
        p.USART2,
        p.PA3,
        p.PA2,
        irq,
        p.DMA1_CH6,
        p.DMA1_CH5,
        Config::default(),
    );

    usart.write(b"Starting Echo\r\n").await.unwrap();

    let mut msg: [u8; 8] = [0; 8];

    loop {
        usart.read(&mut msg).await.unwrap();
        usart.write(&msg).await.unwrap();
    }
}
Conclusion
In this post, a UART-based application using DMA channels was created using Rust on the Nucleo-F401RE development board. All code was created leveraging the embassy framework for STM32. It shows how attaching and configuring DMA channels in embassy is quite simple compared to other Rust HALs. Have any questions/comments? Share your thoughts in the comments below 👇.